


A robot vacuum cleaner mopping a timber floor in a modern Australian living room
An auto vacuum and mop does more than just roll around the floor. Used correctly, it can replace your weekly hand-mopping routine entirely — keeping hard floors clean between deeper cleans with minimal input from you. But getting the most out of the mopping function takes a bit of setup and a few habits worth knowing upfront.
How Robot Vacuum Mopping Works
Most robot vacuums with mopping use one of two systems: a water-fed pad or a spinning mop head. In both cases, the robot carries water from an onboard tank and releases it onto the pad or mop as it moves across the floor.
The key difference between basic and more capable models comes down to how the water is managed and how the mop is maintained mid-clean. Entry-level robots use a passive drip system where water soaks the pad gradually. More advanced models control water flow in real time, adjusting output based on the floor surface or the level of dirt detected.
The mopping function works best as a maintenance tool for light daily grime, dust, and spills on sealed hard surfaces. It is not designed to replace deep scrubbing on heavily soiled floors. For a closer look at how the technology works, see our robot mop vacuum explained guide.
Which Floors Work Best
Sealed hard floors are where robot mopping genuinely excels. Tile and polished concrete handle moisture well and tend to show the most visible improvement after a mop cycle. Timber and laminate work reliably too, provided the surface is sealed and you use a low water flow setting to avoid moisture sitting on the boards.
Vinyl and linoleum are also well-suited, particularly in kitchens and bathrooms where foot traffic and spills are frequent.
Luxury vinyl plank (LVP) is a popular choice across Australian homes and works well with robot mopping when the seams are tightly sealed. LVP is engineered to handle moisture, but persistent water sitting on poorly sealed seams can eventually cause the planks to lift or curl. Use a low to medium water flow setting and avoid running consecutive heavy mop cycles over the same area.
Floors that need extra care include natural stone like marble or travertine, which can be damaged by acidic cleaners or excess moisture, and engineered timber in older homes that may have an incomplete seal. Always run a test patch in a low-visibility area if you are unsure how a surface will respond.
Setting Up the Mopping Function
Before running a mop cycle for the first time, a few things are worth getting right from the start.
Attach the Mop Pad Correctly
Most robots have a dedicated mop module or attachment plate. Attach it securely before starting. Slightly damp the microfibre pad before attaching it — this helps it pick up debris more effectively from the first pass rather than just pushing it around on a dry surface.
Fill the Water Tank
Fill the onboard water tank with clean tap water. Unless your model explicitly supports cleaning solutions, stick to plain water. Many manufacturers caution against detergents as they can cause internal corrosion or leave residue on floors over time. If your robot supports a cleaning solution, use only the brand-recommended type.
Set No-Mop Zones in the App
Use your robot's app to draw no-mop zones over any rugs, carpet, or absorbent floor mats before you run a mop cycle. Without these boundaries, the robot may drag a wet pad across carpet fibres, leaving damp patches and potentially causing odour or mould over time.
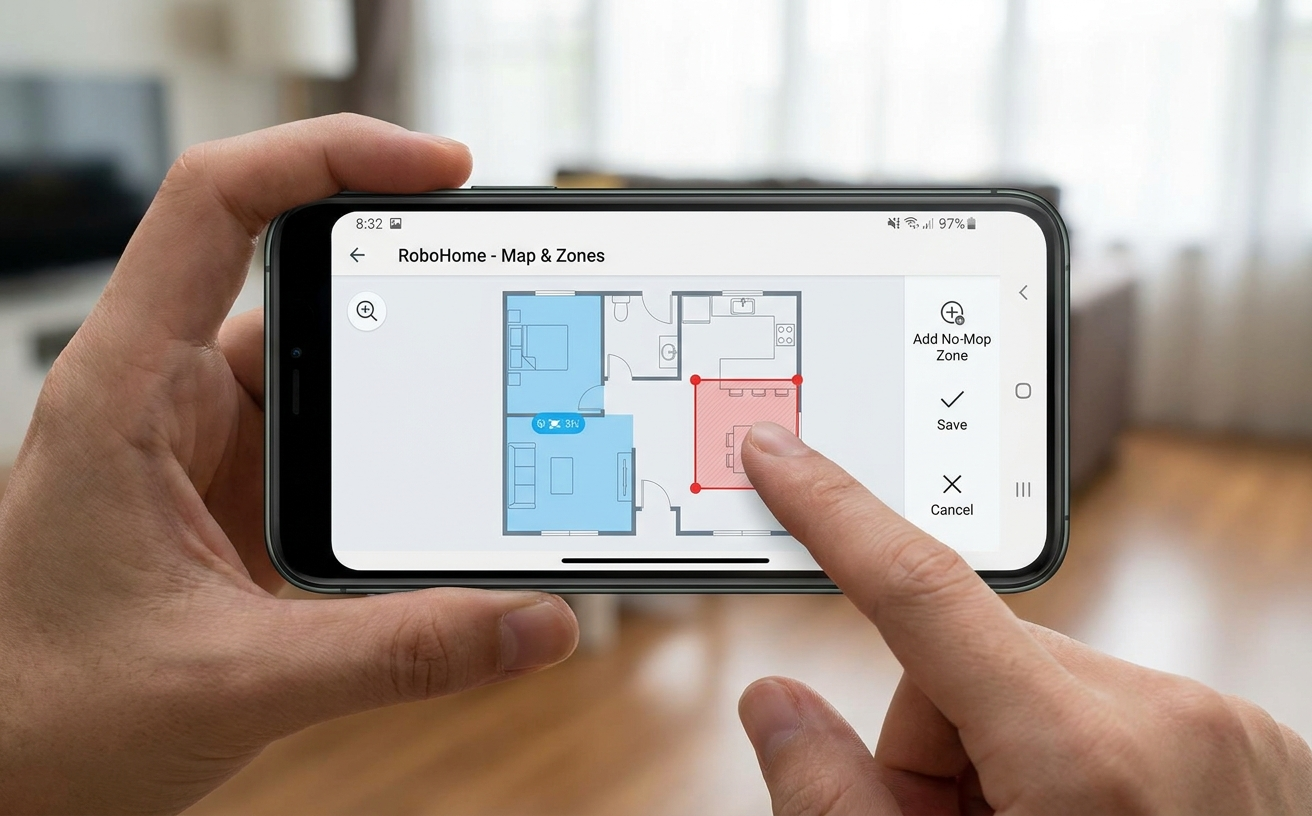
Setting no-mop zones in a robot vacuum app to protect carpet areas
Confirm Your Floor Type Is Compatible
Robot vacuum mopping is designed for sealed hard surfaces such as timber, tile, vinyl, laminate, and polished concrete. Avoid running the mop function on unsealed timber, natural stone without sealant, or any surface that cannot tolerate moisture. If in doubt, check your flooring manufacturer's care guide.
How to Run a Mop Cycle
A successful mop cycle comes down to three things: clearing debris first, choosing the right mode and water level, and checking the result before locking in a routine.
Vacuum First
Run a vacuum-only pass before mopping, or use a model that vacuums and mops in sequence rather than simultaneously. If the robot mops over loose debris, the wet pad becomes dirty almost immediately and can spread grime rather than lift it. A clean pass first makes the mop cycle significantly more effective.
Choose the Right Mode
Most robots offer a dedicated mop mode, a vacuum-then-mop mode, or a combined mode. For regular maintenance on lightly dirty floors, mop-only or vacuum-then-mop works well. For a deeper clean, select a higher water flow and consider running a second mop pass.
Set the water level based on your floor type: lower flow for polished or sensitive surfaces, higher flow for tile or heavily trafficked areas.
Monitor the First Few Runs
After the first cycle, check the floor finish and pad condition. This helps calibrate water flow settings and confirms whether any no-mop zones need adjusting.
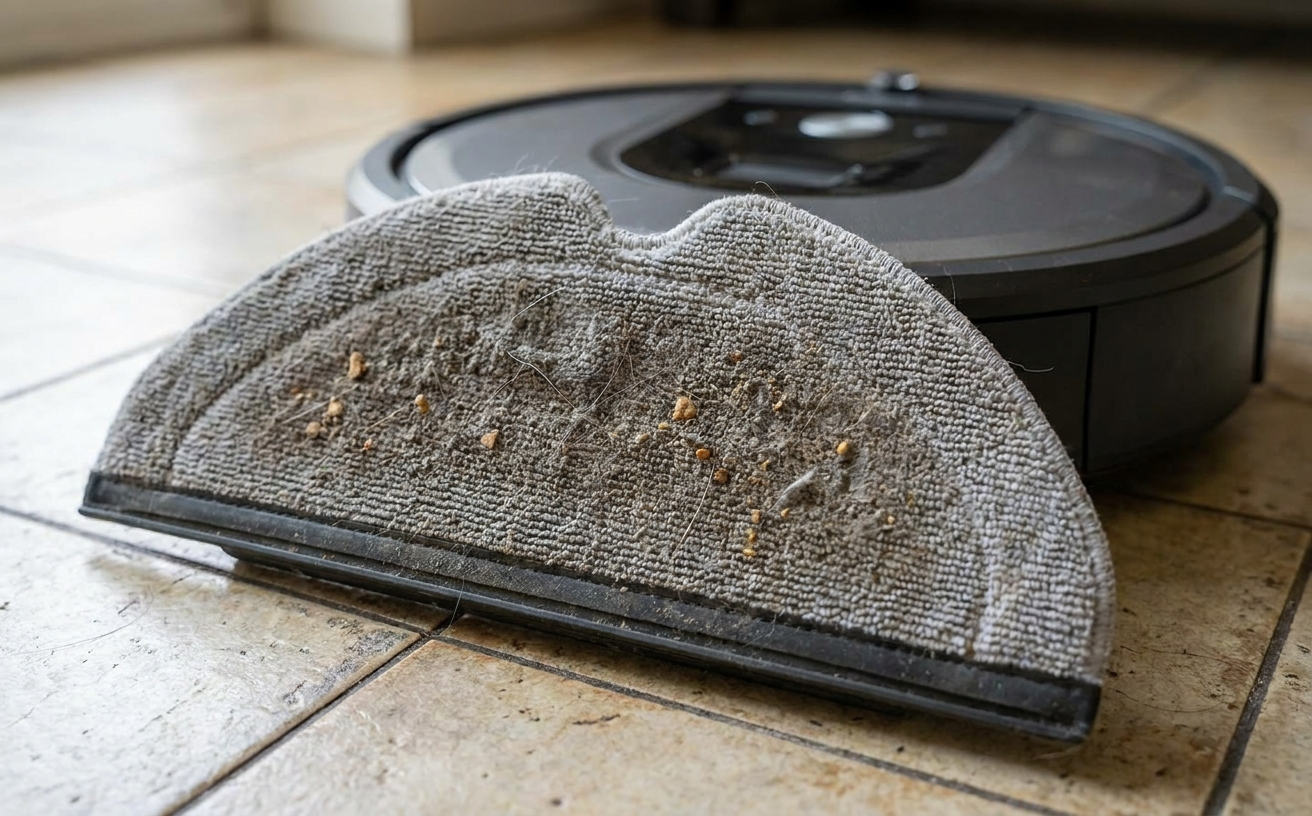
A microfibre mop pad from a robot vacuum showing dirt collected after a cleaning cycle
How Often to Run the Mopping Function
For most Australian households, mopping two to three times per week is a practical frequency for regular floor maintenance. Kitchens and high-traffic areas benefit from more frequent cycles. Living areas and bedrooms with less foot traffic can be mopped less often without noticeable difference.
Scheduling through the app makes this hands-free. Many users set a mop cycle to run in the morning or while out of the house, so the floor is dry and ready by the time they return.
For heavily soiled floors or after hosting events, running two consecutive mop cycles tends to produce better results than a single longer pass.
Daily use is fine for most robot vacuum mops, particularly on hard floors. Manufacturers design these machines for regular operation, and homes with pets or children often benefit from a daily light cycle. Just keep up with pad washing and tank emptying — the wear comes from skipped maintenance, not from frequent runs.
Maintaining the Mop Pads
Pad maintenance is the most important variable in mopping performance. A dirty pad does not clean — it redistributes grime. Wash mop pads after each use with mild detergent and warm water, then allow them to air dry before reattaching.
Keep two to three spare pads on hand so you can swap immediately during a cleaning session rather than waiting for the previous pad to dry. If the pads start to smell even after washing, soaking them in a diluted white vinegar solution before rinsing can help remove odour-causing buildup.
Most microfibre mop pads last between three and six months with regular use before they begin to lose their cleaning effectiveness. Replace them when you notice the floor looking streaky or when the pad surface starts to fray.
Post-Mopping Maintenance
A few short tasks after each cycle keep the robot performing reliably and prevent issues that build up silently over time.
Empty the Water Tank
Do not leave water sitting in the tank between cleaning sessions. Standing water encourages mould and bacterial growth inside the tank. Empty any remaining water after each cycle and leave the tank open or detached to dry.
Clean the Robot's Sensors
Cliff sensors and navigation sensors need to stay clean to function accurately. Wipe them with a dry microfibre cloth after every few cleaning sessions. A sensor obscured by dust or water residue can cause the robot to navigate erratically or miss areas.
Check the Dock
If your robot returns to a dock that handles mop washing and drying, check the dirty water tank in the dock regularly and empty it before it reaches capacity. A full dirty water tank causes the dock to stop cleaning the mop pads mid-cycle, leaving them damp and dirty between sessions.
Common Mopping Problems
Most issues with robot vacuum mopping trace back to one of three causes: a dirty pad, the wrong water flow setting, or missing app boundaries. Here is how the most common problems show up and what to adjust.
Streaky Floors
Streaking usually means the mop pad is too dirty, the water flow is too high, or there is residue from a cleaning solution on the pad. Wash the pads, lower the water setting, and run a dry cloth over the floor after the cycle to check if the streaks persist.
Floors Still Feel Gritty
If the floor feels gritty after mopping, the vacuum pass likely did not pick up all loose debris before the mop cycle ran. Increase the suction level, run a separate vacuum pass first, or clean the robot's filter.
Carpet Getting Wet
Check that no-mop zones are set correctly in the app and that the mop lift height is configured for your carpet thickness. Most robots with carpet detection will raise or retract the mop automatically, but the detection needs a clear path to function.
Robot Leaving Dirty Water Marks
This typically means the mop pad has not been wrung out or dried properly, or the water flow is set too high. Lower the water setting by one level and make sure pads are fully dry before the next cycle.
Limitations of Robot Vacuum Mopping
Robot vacuum mopping is built for routine maintenance, not heavy-duty cleaning. If you are weighing it against traditional methods, our vacuuming vs mopping guide covers where each approach fits. Knowing where robot mopping falls short helps set realistic expectations.
Dried-on stains, sticky spills, and ground-in dirt usually need a hand mop or targeted scrubbing. Robot mops apply consistent but moderate pressure, which works well for daily grime but cannot replicate the force of a dedicated scrub.
Performance also depends heavily on setup. Without no-mop zones, accurate floor mapping, and the right water flow setting, results drop noticeably. The hardware is capable, but the output reflects how well the app is configured.
Maintenance is non-negotiable. Skip pad washing or tank emptying for a few cycles and the robot will start spreading dirt rather than removing it. The time saved on mopping shifts to maintenance — less work overall, but not zero work.
And robot mops are not built to handle large spills, standing water, or unsealed flooring. Use them within their intended scope and they perform reliably; push past it and damage becomes likely.
Narwal Robot Vacuum and Mop Models to Consider
Three Narwal models stand out for Australian homes. If you are still deciding on the right type of machine, the mop vacuum combo guide covers what to look for before buying.
The Narwal Flow robot vacuum and mop uses a track mop system with real-time self-cleaning — the mop stays in constant contact with clean water and a scraper during the cycle, which reduces smearing on harder-to-clean surfaces. It lifts the mop automatically when carpet is detected and extends the mop to within 5mm of walls for edge coverage.
[cta:narwal-flow-robot-vacuum-mop]
The Narwal Freo X10 Pro robot vacuum and mop pairs 11,000 Pa suction with a Reuleaux triangular mop that covers more of the floor edge compared to circular mops. The base station washes and hot-air-dries the mop pads automatically, which removes one of the main maintenance steps.
[cta:narwal-freo-x10-pro-robot-vacuum-mop]
For homes with a mix of hard floors and carpet, the Narwal Freo Z10 Ultra robot vacuum and mop adds AI-adaptive hot-water mop washing at the dock, adjusting water temperature based on how dirty the mop pads are. The triangular EdgeReach mop extends into corners and along walls more precisely than most standard designs.
[cta:narwal-freo-z10-ultra-robot-vacuum-mop]
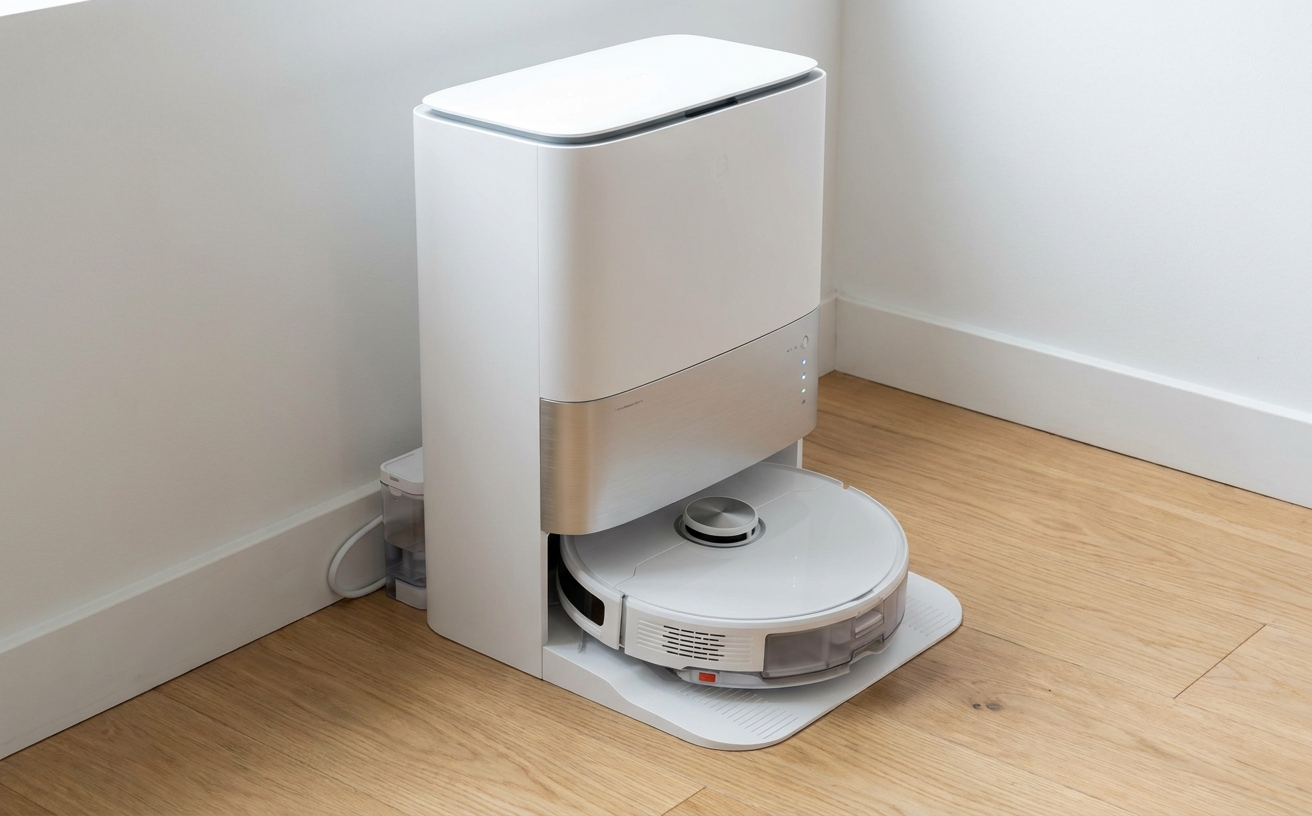
A robot vacuum base station dock on a hard floor near a wall in a clean home setting
FAQs
What can I put in the water tank? Can I use Pine O Cleen or other cleaning solutions?
Plain tap water is the safe default for almost every robot vacuum mop. Pine O Cleen, Pine-Sol, vinegar, and most household floor cleaners are not recommended — they can cause internal corrosion, void warranties, and leave residue that streaks the floor. Some robots support brand-specific cleaning solutions formulated for the internal pumps and tanks. If your model supports one, use only that. Always check the manual before adding anything other than water.
How often should I replace the mop pads?
Every three to six months with regular use is a general guide. Replace sooner if you notice the floor looking streaky after mopping or if the pad surface begins to fray.
Is robot vacuum mopping good enough to replace hand mopping?
For regular maintenance on sealed hard floors, yes. Robot mopping handles light daily grime, dust, and foot traffic residue well. For heavy-duty cleaning after a party or dealing with stubborn dried-on stains, a hand mop or more targeted cleaning may still be needed.
Can a robot vacuum mop clean up spills?
Robot vacuums are not designed to clean up large spills or standing water. Blot up any significant spills manually before running a mop cycle over the area.
Do robot mops leave the floor wet, and how long does it take to dry?
Robot mops leave the floor lightly damp rather than wet. On tile and vinyl, floors typically dry within 5 to 15 minutes. Timber and laminate may take 15 to 30 minutes depending on water flow setting and ventilation. If the floor stays wet longer than that, lower the water flow by one level.
How long do robot mops typically last?
A well-maintained robot vacuum mop generally lasts four to six years before performance noticeably drops. The battery is usually the first component to weaken, often after two to three years of daily use. Brushes, filters, and mop pads are consumables and should be replaced on schedule. Skipping pad washing and tank emptying shortens the lifespan more than any other factor.


