


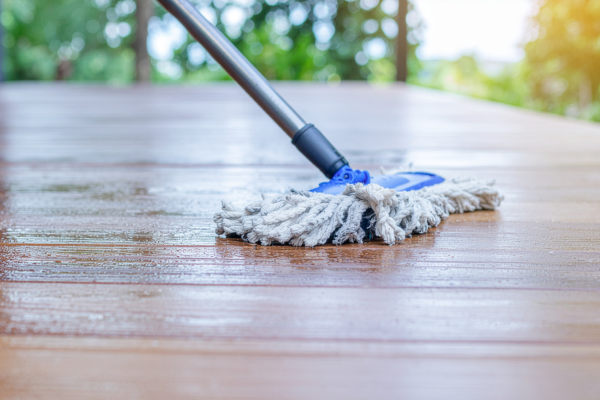
Learning how to mop floors the right way is the key to keeping every surface — from tile to hardwood — clean, streak-free, and protected. Most people use too much water or the wrong cleaner, leaving behind dull patches or sticky residue. This guide explains exactly how to get spotless floors without damage, no matter what material you’re cleaning.
You’ll start by preparing your space and choosing the correct mop and cleaning solution for each floor type. Then, you’ll learn the proven step-by-step mopping technique that delivers a streak-free finish, plus how to adjust your method for wood, tile, laminate, vinyl, bamboo, and stone floors. We also cover how often to mop based on floor material and household activity, so you can create a routine that fits your lifestyle.
Finally, you’ll see the most common mopping mistakes — and how to fix them — followed by our top Narwal cleaning solutions that combine advanced robot mop and wet and dry vacuum technology for effortless, professional-level results at home.
How to Prepare Floors Before Mopping
Before you mop, the right preparation makes the difference between clean, streak-free floors and dull, sticky surfaces. Proper prep removes hidden grit, prevents scratches, and ensures your cleaner works effectively on every floor type.
Identify Your Floor Type Before Mopping
Each floor reacts differently to water and cleaning products. Knowing what you are cleaning helps you choose the right tools and moisture level.
|
Floor Type |
Water Tolerance |
Safe Cleaning Solution |
Key Notes |
|---|---|---|---|
|
Tile |
High |
Mild detergent or pH-neutral cleaner |
Rinse to avoid residue |
|
Hardwood |
Low |
Wood-specific cleaner |
Avoid standing water |
|
Laminate |
Very low |
Laminate-safe spray |
Never soak or steam |
|
Vinyl / Linoleum |
Moderate |
Mild detergent |
Wring mop until damp |
|
Stone (marble, granite, slate) |
Low |
pH-neutral cleaner |
Avoid vinegar or acid |
If unsure, check the floor manufacturer’s care guide. Following those directions prevents damage and preserves your floor warranty.
Choose the Right Mop and Cleaning Solution
The right mop and cleaner make mopping faster, safer, and more effective. Use the table below to match each floor type with the best cleaning tools and products.
|
Mop Type |
Best For |
Key Benefits |
Recommended Cleaning Solution |
|---|---|---|---|
|
Microfiber mop |
Hardwood, laminate |
Gentle on finish, removes fine dust |
Wood-safe or laminate-safe cleaner |
|
Flat mop |
Large smooth areas, vinyl, bamboo |
Covers wide areas evenly, easy to wring |
pH-neutral cleaner or mild detergent |
|
String / Spin mop |
Tile and vinyl |
Deep cleans grout and textured surfaces |
Mild detergent in warm water |
|
Spray mop |
Spot cleaning, small areas |
Fast drying, precise moisture control |
Diluted neutral cleaner or DIY soap mix |
|
Steam mop |
Sealed tile or vinyl |
Sanitizes without chemicals, deep cleans grime |
Water only (avoid on wood or unsealed floors) |
|
Wet & Dry Vacuum Mop (e.g., Narwal S20 Pro) |
Multi-surface homes, pet areas |
Vacuums and mops in one step, dries instantly |
Built-in solution or neutral floor cleaner |
|
Robot mop (e.g., Narwal Freo, Flow) |
Daily cleaning, mixed floors |
Detects floor type, auto-adjusts water, self-cleans pads |
Manufacturer-approved solution |
Avoid bleach, ammonia, or acidic liquids unless your floor manufacturer confirms they are safe. For consistent results, always wring or control moisture so the mop is damp—not wet—to prevent streaks and surface damage.
Pre-Clean Checklist
A quick setup before mopping saves time and improves results:
- Move rugs, chairs, and small furniture out of the way
- Sweep or vacuum to remove dust, hair, and grit
- Spot-clean sticky or greasy areas with a damp cloth
- Prepare your cleaning solution using the correct dilution ratio
- Use a two-bucket system: one for clean solution, one for rinse water
- Wring your mop before each use to prevent excess moisture
A floor that is properly prepared before mopping dries faster, stays cleaner longer, and shows fewer streaks. If you want consistent results with minimal effort, a robot mop like Narwal Freo Series or Narwal Flow can automatically detect floor types and control water output for safe, effective cleaning every time.
How to Mop Floors Step by Step for a Streak-Free Finish
Mopping is easy to do, but easy to do wrong. The secret to clean, streak-free floors is following the right sequence and controlling moisture. This simple, step-by-step process works for tile, hardwood, laminate, vinyl, and bamboo floors.
Step 1: Start in the Farthest Corner
Always begin mopping at the farthest corner of the room and move toward the exit. This prevents footprints and keeps clean sections untouched.
Why it works: It minimizes cross-contamination and ensures you don’t walk over wet areas.
Step 2: Prepare and Wring Your Mop
Soak the mop head in your cleaning solution, then wring until it’s damp—not dripping. Use warm water, not hot, to loosen dirt without softening coatings or warping wood.
Why it works: A damp mop lifts dirt effectively while preventing streaks and water damage.
Step 3: Mop in Small, Overlapping Sections
Work in small areas—about one square meter at a time—and overlap each stroke slightly. For tile and vinyl, use straight lines; for wood or laminate, follow the grain. Rinse the mop often to keep dirty water off the floor.
Why it works: Small sections dry evenly and stop dirty water from spreading.
Step 4: Rinse and Refresh the Water Frequently
After every few sections, rinse the mop and replace the water once it turns cloudy. A two-bucket method—one for clean solution, one for rinse water—keeps floors cleaner longer.
Why it works: Clean water prevents soil redeposit and streak marks.
Step 5: Handle Stubborn Spots Separately
Pause when you find sticky spills or dried stains. Scrub gently with a cloth or sponge using a bit of cleaner, then continue mopping.
Why it works: Isolating tough spots avoids smearing grime across clean areas.
Step 6: Do a Final Clean-Water Pass
If the floor feels tacky or dull, make one last pass with clean water only. Wring the mop thoroughly so it’s barely damp.
Why it works: This removes leftover detergent, leaving a smooth, streak-free finish.
Step 7: Let the Floor Dry Completely
Let the floor air dry fully before walking on it or replacing furniture. Open windows or use fans for faster drying. Never cover damp floors with rugs—moisture can cause odor or swelling.
Why it works: Complete drying protects floor coatings and prevents warping or mold.
Pro-Level Mopping Techniques for Faster, Cleaner Results
Professional cleaners follow a few simple rules to save time and keep every floor streak-free.
These techniques are quick to learn and make a big difference in results.
- Use the Two-Bucket Method: One bucket holds clean solution, the other rinse water. This prevents dirty water from going back onto the floor.
- Move in a Figure-Eight Pattern: Sweep the mop in smooth figure-eight motions instead of random strokes. It covers more area and avoids streaks.
- Wring Often, Mop Damp: A mop should be damp, not wet. Too much water leaves marks and can damage wood or laminate.
- Work in Small Sections: Clean one square meter at a time, then rinse the mop. Smaller zones ensure even coverage and faster drying.
- Replace or Rinse Pads Frequently: Dirty pads spread soil. Rinse or switch microfiber heads every few sections to keep the mop absorbent.
- Use Warm, Not Hot, Water: Warm water dissolves grime effectively without softening floor coatings or warping timber floors.
- Check Your Work from a Low Angle: Look across the floor under natural light. It’s the easiest way to spot missed spots or streaks before the floor dries.
If you want the same professional finish with less effort, a robot mop like Narwal Flow or a wet and dry vacuum such as Narwal S20 Pro automates these steps. They manage water levels, keep pads clean, and dry floors evenly for a consistent, streak-free result.

How to Sanitize Floors While Mopping
To disinfect floors safely, first remove visible dirt. Then apply a pH-neutral disinfecting cleaner suited for your floor type. Avoid bleach on wood, vinegar on stone, or high-alcohol products.
Sanitizing Steps:
- Mop normally to lift surface dirt.
- Apply the disinfectant evenly and let it sit for the contact time listed on the label.
- Rinse once with clean water and let the surface air dry fully.
For families with pets or children, using a wet and dry vacuum like Narwal S20 Pro maintains hygiene automatically with separate water tanks and self-cleaning functions.
How to Mop Each Floor Type the Right Way
Every floor material needs its own cleaning approach. The best way to mop depends on how much water the surface can handle, the type of finish, and the kind of dirt you’re dealing with. Using the wrong method or cleaner can leave streaks, dull the shine, or even cause damage. Follow the floor-specific methods below for a safe, streak-free clean every time.
Tile and Grout Floors
Tile floors can handle more water than other surfaces, but the grout needs special care.
How to mop:
- Use warm water mixed with a small amount of mild detergent or a pH-neutral cleaner.
- Mop in straight lines to cover the floor evenly.
- Focus on grout lines by scrubbing them gently with a soft brush or the mop edge.
- Change rinse water once it looks cloudy.
- Dry with a towel or open windows to prevent streaks.
Pro tip: Avoid bleach or acidic cleaners—they can erode grout over time and fade colored tiles.
Hardwood and Engineered Wood Floors
Wood floors are sensitive to moisture. The key is using minimal water and a cleaner designed for wood.
How to mop:
- Lightly mist the floor with a wood-specific cleaner or spray mop solution.
- Use a microfiber flat mop and follow the grain of the wood.
- Immediately wipe up any visible moisture with a dry cloth.
- For engineered wood, the same rule applies—avoid excess water or steam.
Why it matters: Too much liquid seeps into seams and causes swelling, warping, or discoloration.
Laminate Floors
Laminate floors look like wood but are even less tolerant of moisture.
How to mop:
- Use a microfiber mop slightly dampened with a laminate-safe cleaner or spray.
- Never pour water directly onto the surface.
- Work in short, gentle strokes.
- Dry quickly with a clean towel if any water remains.
Tip: Replace dirty mop pads immediately to avoid streaks from redeposited residue.
Vinyl and Linoleum Floors
These surfaces are durable and can handle more water than laminate or wood.
How to mop:
- Mix warm water with a mild detergent or pH-neutral floor cleaner.
- Use a spin or string mop to lift dirt from textured areas.
- Mop in small sections and rinse often.
- If the floor feels sticky, finish with a clean-water rinse.
Bonus: Vinyl dries quickly—open a window or use airflow for a spotless, streak-free finish.
Bamboo Floors
Bamboo floors are sustainable but delicate. They absorb water easily and show streaks if over-wet.
How to mop:
- Use a barely damp microfiber mop with a bamboo-safe cleaner.
- Mop along the grain direction.
- Dry immediately with a clean towel.
- Avoid wax, oil, or vinegar—these leave a film and dull the finish.
Why it works: Minimal moisture and quick drying protect bamboo from swelling and surface dullness.
Natural Stone and Polished Concrete
Stone and concrete need neutral, non-acidic cleaners to maintain their finish.
How to mop:
- Use a pH-neutral cleaner diluted in warm water.
- Mop in small sections, rinsing often to avoid haze.
- Buff with a soft dry cloth after cleaning to prevent water spots.
- Avoid vinegar, lemon, or ammonia—they etch and dull stone surfaces.
Tip: For polished concrete, use a damp microfiber mop only—too much water can leave calcium marks.
Is a Steam Mop Safe for My Floor Type?
Steam mops can be effective for sanitizing sealed tile or vinyl, but they are risky for most other surfaces.
|
Floor Type |
Steam Mop Safe? |
Notes |
|---|---|---|
|
Tile / Porcelain |
Yes |
Use medium steam; avoid grout saturation |
|
Vinyl / Linoleum |
Yes |
Quick passes only; excessive heat can lift seams |
|
Sealed Stone |
Limited |
Use low steam and keep mop moving |
|
Hardwood / Engineered Wood |
No |
Moisture and heat can warp planks |
|
Laminate / Bamboo |
No |
Steam can separate layers and cause swelling |
If you want the deep-clean effect of steam without the risk of heat or puddles, a wet and dry vacuum such as Narwal S20 Pro offers similar sanitizing results. It uses controlled warm water and suction to lift dirt while drying the surface instantly—perfect for mixed-floor homes.
Each floor requires the right balance of moisture, cleaner, and technique. Tile and vinyl thrive on thorough rinsing, wood and bamboo demand restraint, and stone needs a neutral touch. By matching your method to your material, you’ll keep every surface clean, streak-free, and long-lasting.
How Often Should You Mop Floors Based on Floor Type
How often you mop depends on your floor type, how busy your home is, and the climate you live in. Mopping too frequently can wear down floor finishes, but not mopping enough lets dust and grit scratch the surface. Use this guide to plan a schedule that keeps your floors clean without overdoing it.
Recommended Mopping Frequency by Floor Type
|
Floor Type |
Standard Frequency |
High-Traffic Homes (kids, pets, entryways) |
Notes |
|---|---|---|---|
|
Tile floors |
Once a week |
2–3 times a week |
Clean grout more often; rinse well to prevent residue. |
|
Hardwood floors |
Every 1–2 weeks |
Weekly |
Damp mop only; avoid standing water. |
|
Laminate floors |
Every 2 weeks |
Weekly |
Use minimal water and quick-dry pads. |
|
Vinyl / Linoleum floors |
Weekly |
2 times a week |
Use mild detergent; prevent buildup with a light rinse. |
|
Stone / Concrete floors |
Every 2 weeks |
Weekly |
Mop with pH-neutral cleaner; buff dry to maintain shine. |
|
Low-traffic rooms |
Every 3–4 weeks |
As needed |
A light dry mop between sessions keeps dust down. |
Mopping removes fine debris that causes surface wear. Keeping a consistent schedule prevents dullness and protects your floor’s finish over time.
Adjusting Your Mopping Schedule Between Deep Cleans
Daily maintenance can extend or reduce how often you need to mop. Instead of sticking to a fixed schedule, observe how your floors look and feel.
- Light cleaning with a dry or microfiber mop reduces full mopping sessions.
- Vacuum or sweep high-traffic areas daily to prevent grit buildup.
- Spot-clean spills immediately to stop sticky patches from spreading.
- Use doormats at entry points to keep outside dirt from reaching indoor floors.
- Automate routine cleaning — a robot mop like Narwal Flow can handle daily upkeep, letting you reduce manual mopping to once a week or less.
The cleaner you keep floors between deep cleans, the less often you’ll need to mop thoroughly.
Mopping Frequency in Humid or Dry Climates (Australia Focus)
Climate changes how often floors need cleaning and drying. Humidity increases moisture exposure, while dry air collects dust faster.
In humid regions (Sydney, Brisbane):
- Mop less frequently, using minimal water.
- Ensure full drying after each session to prevent swelling or odor on wood floors.
In dry regions (Adelaide, Perth, inland NSW):
- Mop slightly more often to remove fine dust.
- Use gentle, neutral solutions to prevent static and dullness on timber or laminate.
Seasonal adjustments:
- Summer: more frequent cleaning to handle open windows, pollen, and humidity.
- Winter: focus on entryways where rain or mud increases floor traffic.
Adapting your mopping frequency to local humidity and household activity keeps your floors stable and clean year-round.
Mopping frequency isn’t fixed — it’s a balance between cleanliness, floor protection, and lifestyle. Busy homes or dusty climates need more frequent care, while low-traffic spaces can go weeks between deep cleans. Consistent light maintenance and smart cleaning tools, such as a robot mop or wet and dry vacuum, help you keep floors clean without extra effort or over-mopping.
Most Common Mopping Mistakes and How to Fix Them for Streak-Free Floors
Even with good intentions, many people mop the wrong way — and the results show. Streaks, sticky patches, or dull floors usually mean one thing: a small mistake repeated over time. Here are the most common mopping errors, why they happen, and how to fix them for spotless, long-lasting results.
1. Using Too Much Water
Excess water is the most common mistake, especially on wood, laminate, or bamboo floors. When water seeps into seams, it causes swelling, warping, or dullness.
Fix it:
- Always wring your mop until it’s just damp, not dripping.
- For delicate floors, spray a fine mist instead of soaking.
- If water puddles appear, dry them immediately with a clean towel.
Controlled moisture cleans more efficiently and prevents floor damage — less water gives better results.
2. Adding Too Much Detergent or the Wrong Cleaner
More soap doesn’t mean cleaner floors. Overuse leaves residue that attracts dust and leaves streaks. Harsh chemicals can strip floor finishes or etch stone surfaces.
Fix it:
- Use a pH-neutral or floor-specific cleaner.
- Follow dilution instructions carefully — most need only a small capful per bucket.
- Rinse once with clean water if the floor feels sticky or looks cloudy.
Balanced cleaning formulas lift dirt without leaving film or dullness.
3. Reusing Dirty Water
Dirty water spreads grime instead of removing it. This creates streaks, sticky patches, and grey film — especially visible on light tiles or polished floors.
Fix it:
- Replace rinse water as soon as it turns cloudy.
- Use a two-bucket system: one for clean solution, one for rinsing.
- For consistent cleanliness, use tools that separate dirty and clean water automatically, such as a wet and dry vacuum like Narwal S20 Pro.
Clean water means cleaner floors. Reusing dirty water is like washing dishes in used soap — the dirt stays behind.
4. Mopping Too Large an Area Without Rinsing
Covering large areas without rinsing the mop spreads dirt in thin layers, creating streaks that appear once the floor dries.
Fix it:
- Work in small sections (about one square meter at a time).
- Rinse and wring the mop after each section.
- Change mop pads when they look visibly dirty.
Small, consistent sections keep water clean longer and ensure every part of the floor dries evenly.
5. Using the Wrong Mop for the Surface
Each floor type needs a compatible mop. String mops push too much water for wood floors, and abrasive pads can scratch vinyl or stone.
Fix it:
- Microfiber or flat mops are best for wood, laminate, and bamboo.
- String or spin mops suit tile and vinyl.
- For mixed flooring, a robot mop such as Narwal Flow automatically detects surface type and adjusts water levels.
The right mop protects the surface and improves cleaning efficiency.
6. Walking on Wet Floors Too Soon
Walking on wet floors leaves footprints and reintroduces dirt before the surface has dried. It also increases the risk of streaks from trapped moisture.
Fix it:
- Wait until the floor is fully dry before walking or replacing furniture.
- Improve airflow by opening windows or using fans.
Proper drying ensures a smooth, streak-free finish and prevents moisture damage.
7. Not Replacing or Cleaning Mop Pads Often Enough
A dirty mop head can’t absorb soil — it simply pushes it around. Even microfiber loses effectiveness when clogged with detergent residue.
Fix it:
- Wash mop pads after each use with mild detergent and no fabric softener.
- Replace them every few months or sooner if worn.
- If you use a robot mop, ensure pads are cleaned and dried automatically after each cycle.
Fresh pads absorb better and help maintain consistent shine.
Why Does My Floor Look Cloudy After Mopping?
Cloudiness after mopping is one of the most common complaints. It usually happens when residue builds up over time.
Causes:
- Too much detergent or incorrect dilution
- Reused dirty water
- Hard water minerals left after evaporation
- Mop pads not rinsed properly
Fixes:
- Mop once more using only clean, warm water and a damp pad.
- For stubborn haze, mix one cup of white vinegar with four liters of water — only for tile or vinyl, not wood or stone.
- Buff dry with a microfiber cloth to restore natural shine.
If haze reappears quickly, reduce detergent use or switch to a pH-neutral cleaner.
Most streaks and dull spots aren’t from the floor — they’re from the method. Mopping with clean water, the right amount of solution, and proper tools makes a bigger difference than any product. Avoiding these simple mistakes will leave your floors cleaner, brighter, and streak-free every time.
Best Narwal Cleaning Solutions for Streak-Free Floors
When it comes to spotless floors without the strain of manual mopping, Narwal’s latest robot mop and wet-dry vacuum lineup brings professional-grade results to everyday cleaning. Below are the top picks that best match the needs of modern households—whether you want deep mopping, hair-free performance, or quick cleanup for spills.
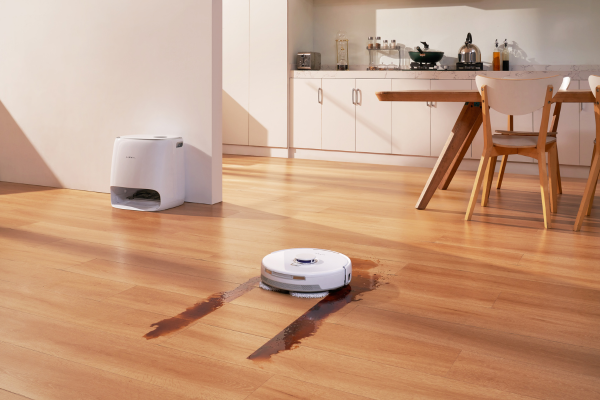
1. Narwal Flow — The Ultimate 2-in-1 Robot Mop for Whole-Home Cleaning
If you want one device that vacuums and mops seamlessly, Narwal Flow delivers a hands-free deep clean across all floor types.
[cta:narwal-flow-robot-vacuum-mop]
- 22,000 Pa suction power removes visible and hidden debris from hardwood and tile.
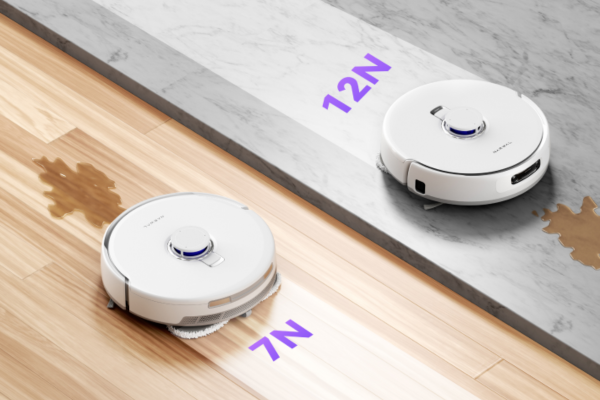
- 12 N mopping pressure + 113 °F warm-water rinse breaks down sticky stains without streaks.
- Real-time self-cleaning system ensures every mop pass uses clean water only—no cross-contamination.
- CarpetFocus™ Technology detects rugs, lifts mops automatically by 12 mm, and boosts suction for dry cleaning.
- AI obstacle avoidance + 3.7-inch slim profile lets it clean under furniture and around edges within 5 mm.
- Maintenance-free dock washes, dries, and empties automatically—up to 120 days of hands-off cleaning.
Ideal for: busy families or pet owners who want fully automated floor care that rivals professional cleaning.
2. Narwal Freo Z10 Ultra — Smart Deep-Cleaning Robot for Streak-Free Perfection
[cta:narwal-freo-z10-ultra-intelligent-in-mind-deep-in-clean]
For homes that demand precision cleaning with minimal effort, the Freo Z10 Ultra combines adaptive intelligence with high-pressure scrubbing.
- 18,000 Pa suction and 8 N dual-mop pressure deliver spotless edge-to-edge results.
- Dual RGB cameras + AI chips map surroundings and avoid over 200 objects with millimeter precision.
- Adaptive hot-water mop washing (113–167 °F) adjusts to dirt level—gentle for powder, intense for oil stains.
- EdgeReach™ triangular mop extension cleans corners other robots miss.
- Quiet all-in-one base station self-empties, washes, and dries for 120 days with minimal noise (< 60 dB).
Ideal for: large homes or households with mixed flooring needing streak-free deep mopping and true corner cleaning.
3. Narwal S30 Pro — Wet & Dry Vacuum for Everyday Spills and Quick Maintenance
[cta:narwal-s30-pro-wet-dry-vacuums]
When you need to handle liquid and dry messes instantly, Narwal S30 Pro makes cleaning fast and effortless.
- 20,000 Pa suction + 20 N downward force handles heavy wet spills and debris in a single pass.
- Always-cleaning-with-fresh-water system separates dirty and clean water continuously.
- Built-in scissors + dual combs cut and clear tangled hair automatically—SGS & TÜV certified 0% tangle rate.
- AI DirtSense™ adjusts suction and roller speed for optimal cleaning power.
- 194 °F hot-water self-wash + auto-drying keeps rollers hygienic and odor-free after every use.
- Quiet operation (45 dB) and lightweight design (< 10 lbs) ensure easy daily use.
Ideal for: kitchens, bathrooms, or families with kids and pets who need quick, hygienic cleanup without manual effort.
Why Choose Narwal
Every Narwal model is engineered for real-life homes — tackling spills, dust, and hair without the hassle. From AI-powered obstacle avoidance to self-cleaning docks, each product minimizes manual work while maximizing shine and hygiene. Whether you prefer full automation with Narwal Flow or everyday convenience with S30 Pro, the result is the same: spotless, streak-free floors that stay clean longer.
Do you mop with soap or just water?
Use a small amount of mild detergent or a pH-neutral cleaner — never plain water. Water alone can’t remove grease or buildup, while too much soap leaves residue and streaks.
Do I need to rinse the floor after mopping?
Yes. Rinsing with clean water removes leftover cleaner and prevents a sticky or cloudy finish. For wood and laminate, use a lightly damp mop instead of soaking to avoid damage.
Should you mop twice?
Only when floors are heavily soiled or feel sticky after the first pass. A quick second mop with clean water helps remove residue and restore shine.
Why does my floor feel sticky after mopping?
Sticky floors come from too much detergent or soap that wasn’t rinsed away. Mop again with clean warm water and a microfiber pad to remove residue completely.
Can I mix vinegar and dish soap to mop floors?
You can mix a small amount of vinegar and dish soap for tile or vinyl, but avoid this on wood, laminate, or stone. Acidic vinegar can dull finishes, and soap can leave streaks if not rinsed properly.
How do professional cleaners mop so fast?
They use efficient systems: the two-bucket method, figure-eight motion, and clean water control. To replicate this at home, use a robot mop like Narwal Flow, which automates these techniques for a consistent, streak-free finish.
Should I mop floors with hot or cold water?
Warm water is best for mopping. It loosens dirt effectively without softening floor coatings or damaging adhesives.
Why do streaks appear after mopping?
Streaks usually come from dirty water, excess soap, or a mop that’s too wet. Always rinse the mop often and wring it until it’s damp, not dripping.
What’s the fastest way to mop floors?
Work in small, overlapping sections and rinse your mop regularly. For large homes, a wet and dry vacuum like Narwal S20 Pro can clean and dry in one pass for faster results.
Can I use vinegar in my mopping water?
Yes, but only on tile or vinyl floors. Avoid using vinegar on hardwood or stone — it can dull or etch the surface over time.
Conclusion: How to Mop Floors the Right Way for a Lasting, Streak-Free Shine
Mopping floors correctly isn’t about how often you clean — it’s about how you clean. The right sequence, tools, and water control are what separate a spotless, streak-free finish from one that looks dull minutes later. Across every surface — tile, hardwood, laminate, vinyl, or stone — the same rule applies: clean with purpose, not force.
A proper mopping routine includes:
- Preparing each floor type with the right cleaner and minimal moisture.
- Mopping in small, overlapping sections with a damp mop, not a wet one.
- Rinsing often with clean water and allowing the surface to dry fully.
- Using pH-neutral or surface-specific solutions to protect finishes.
- Avoiding overuse of detergent, excess water, or dirty pads that cause streaks.
Smart cleaning tools now make this process effortless. A modern robot mop can handle daily upkeep, while a wet and dry vacuum like Narwal S20 Pro deep-cleans and dries floors in one pass. Together, they remove the guesswork from mopping — maintaining perfect moisture balance and ensuring every clean uses fresh water only.
If you’re ready to simplify floor care while achieving professional results, explore the full range of intelligent cleaning systems at Narwal Australia. Whether you’re restoring shine to hardwood or keeping tile spotless, consistent care and the right technology will help your floors stay clean, protected, and beautifully streak-free every day.


